Want to brighten your smile in photos without spending a dime? Whitening teeth in images is easier than ever with free tools available online or on your smartphone. This SEO-friendly guide will walk you through simple, effective methods to achieve a dazzling smile in your photos using free apps and software. Let’s dive in!

Why Whiten Teeth in Photos?
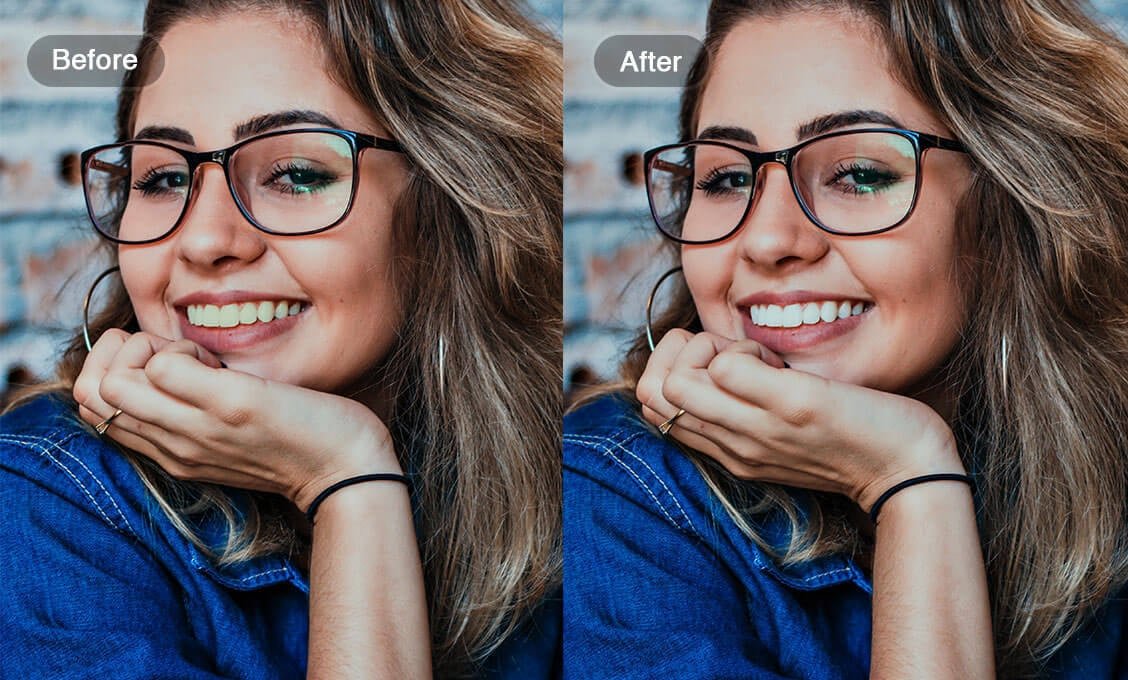
A bright, white smile can enhance your appearance in photos, boosting confidence and making your images stand out. Whether it’s for social media, professional headshots, or personal memories, free photo editing tools make it quick and easy to perfect your smile.
Top Free Tools for Teeth Whitening
Here are the best free tools you can use to whiten teeth in photos:
- GIMP – A powerful, free desktop software for detailed photo editing.
- Photopea – A browser-based tool similar to Photoshop, no download required.
- Pixlr – An easy-to-use online editor with teeth-whitening features.
- Fotor – A user-friendly online and mobile app for quick edits.
- Snapseed – A free mobile app (iOS and Android) with precise editing tools.
Step-by-Step Guide to Whiten Teeth in Photos for Free
Method 1: Using Photopea (Browser-Based)
Photopea is a free, Photoshop-like tool that works in your browser. Follow these steps:
- Open Photopea: Go to photopea.com and upload your photo by clicking File > Open.
- Zoom In: Use the zoom tool (magnifying glass) to focus on the teeth.
- Select the Teeth: Use the Lasso Tool or Quick Selection Tool to carefully outline the teeth.
- Adjust Hue/Saturation: Go to Image > Adjustments > Hue/Saturation. Lower the Yellows saturation slightly (-20 to -30) to remove stains, then increase Brightness (+10 to +20) for a whiter look.
- Refine Edges: Use the Smudge Tool to blend the edges for a natural effect.
- Save Your Photo: Click File > Export As and choose your preferred format (JPEG or PNG).
Pro Tip: Avoid over-whitening to keep the smile looking natural. Subtle adjustments work best.
Method 2: Using Snapseed (Mobile App)
Snapseed is perfect for editing on the go. Here’s how to whiten teeth:
- Download Snapseed: Install it for free from the App Store (iOS) or Google Play (Android).
- Upload Your Photo: Open the app, tap Open, and select your image.
- Use Selective Tool: Tap Tools > Selective, then tap on the teeth. Adjust the Brightness and Saturation sliders to whiten the teeth.
- Fine-Tune: Use the Brush Tool to paint over the teeth for precise whitening.
- Save Your Edit: Tap Export to save or share your photo.
Pro Tip: Use your finger to zoom in for accurate brushing over the teeth.
Method 3: Using Fotor (Online or Mobile)
Fotor offers a dedicated teeth-whitening feature:
- Access Fotor: Visit fotor.com or download the app.
- Upload Your Photo: Click Edit a Photo and upload your image.
- Select Teeth Whitening: Go to Beauty > Teeth Whitening. Adjust the intensity slider to brighten the teeth.
- Apply and Save: Click Apply, then download your edited photo.
Pro Tip: Fotor’s AI-powered whitening tool makes the process super fast.
Tips for Natural-Looking Teeth Whitening
- Don’t Overdo It: Overly white teeth can look unnatural. Aim for a subtle glow.
- Match Lighting: Ensure the teeth color matches the lighting in the photo.
- Blend Carefully: Use feathering or smudging tools to avoid harsh lines.
- Edit Consistently: If editing multiple photos, apply the same settings for uniformity.
Benefits of Free Teeth Whitening Tools
- Cost-Effective: No need to pay for expensive software or professional editing.
- User-Friendly: Most tools are designed for beginners with intuitive interfaces.
- Accessible: Available on desktops, browsers, or mobile devices.
- Quick Results: Achieve a brighter smile in just a few minutes.
Common Mistakes to Avoid
- Over-Whitening: Teeth that are too bright look fake.
- Ignoring Other Areas: Bright teeth can highlight uneven skin tones, so consider light touch-ups elsewhere.
- Skipping Zoom: Always zoom in to avoid editing surrounding areas like gums or lips.
- Low-Quality Photos: High-resolution images yield better results.
FAQs About Whitening Teeth in Photos
Q: Are free teeth-whitening tools safe to use?
A: Yes, reputable tools like Photopea, Snapseed, and Fotor are safe and don’t require personal data.
Q: Can I whiten teeth in group photos?
A: Yes, but zoom in and edit each person’s teeth individually for precision.
Q: Do these tools work on old photos?
A: Absolutely, as long as the photo has clear details.
Conclusion
Whitening teeth in photos for free is simple with tools like Photopea, Snapseed, and Fotor. By following the steps above, you can achieve a radiant smile without spending a penny. Try these methods today and share your stunning photos with confidence!