Enhancing image resolution can transform blurry or pixelated images into sharp, high-quality visuals. Whether you’re preparing images for professional use, personal projects, or social media, increasing resolution is easier than ever with modern tools. In this SEO-friendly guide, we’ll walk you through a few simple steps to boost image resolution effectively, using accessible tools and techniques.
Why Increase Image Resolution?
High-resolution images are essential for:
- Professional presentations: Clear visuals for websites, portfolios, or marketing materials.
- Printing: Crisp images for posters, flyers, or photo prints.
- Social media: Eye-catching posts that stand out.
- E-commerce: Detailed product images to attract customers.
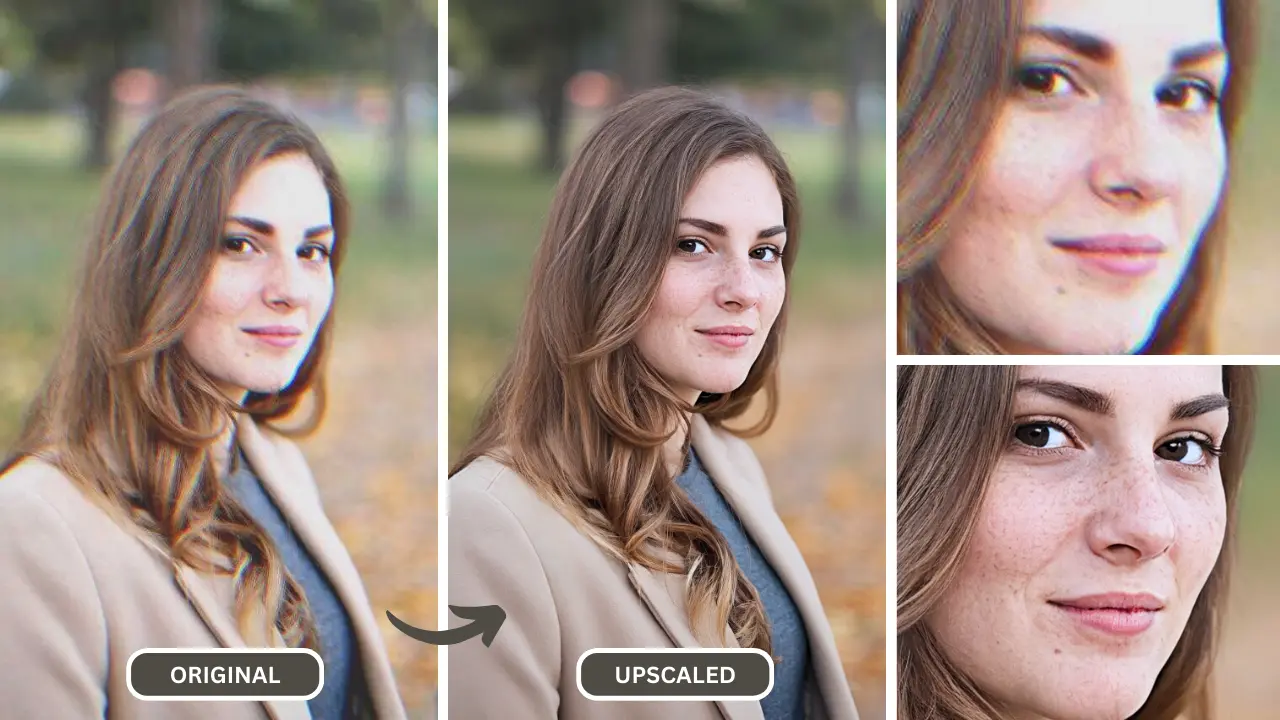
Low-resolution images can appear pixelated, reducing their appeal and usability. Fortunately, you can enhance image quality with minimal effort using the right methods.
Step-by-Step Guide to Increase Image Resolution
Step 1: Choose the Right Tool
To enhance image resolution, select a reliable tool that suits your needs. Popular options include:
- Online Tools: Websites like Let’s Enhance, Pixlr, or Fotor offer user-friendly interfaces for quick edits.
- Software: Adobe Photoshop or GIMP provide advanced control for professional results.
- AI-Powered Apps: Tools like Topaz Gigapixel AI or Remini use artificial intelligence to upscale images with stunning clarity.
For beginners, online tools are ideal due to their simplicity and accessibility. For advanced users, software or AI apps deliver superior results.
Step 2: Upload Your Image
Once you’ve chosen a tool:
- Open the platform or software.
- Upload the low-resolution image you want to enhance.
- Ensure the image is in a common format like JPEG or PNG for compatibility.
Most tools allow drag-and-drop uploads, making this step quick and hassle-free.
Step 3: Adjust Resolution Settings
Depending on the tool:
- Online Tools: Select an “Upscale” or “Enhance” option. Many platforms automatically adjust resolution, but some let you choose a percentage increase (e.g., 2x or 4x).
- Software: In Photoshop, go to Image > Image Size, uncheck “Resample,” and enter your desired dimensions. For best results, use the “Preserve Details” resampling option.
- AI Tools: These apps often analyze and enhance images automatically, adding details to improve sharpness.
Always preview the changes to ensure the image retains clarity without artifacts.
Step 4: Enhance Details (Optional)
To further improve quality:
- Adjust brightness, contrast, or sharpness to make the image pop.
- Use noise reduction filters to smooth out graininess, especially in older photos.
- AI tools often include features to enhance textures, faces, or backgrounds for a polished look.
Be cautious not to over-edit, as this can make the image appear unnatural.
Step 5: Save and Export
Once satisfied with the result:
- Save the enhanced image in a high-quality format like PNG or TIFF for printing, or JPEG for web use.
- Choose the appropriate resolution (e.g., 300 DPI for print, 72 DPI for online).
- Download the file and review it to confirm the quality meets your needs.
Tips for Best Results
- Start with the Best Source: The higher the original image quality, the better the upscaled result.
- Avoid Over-Upscaling: Increasing resolution too much can introduce artifacts or blurriness.
- Use AI Tools for Complex Images: AI upscalers excel at enhancing photos with intricate details, like landscapes or portraits.
- Test Multiple Tools: Different platforms yield varying results, so experiment to find the best fit.
Common Mistakes to Avoid
- Ignoring File Size: High-resolution images can have large file sizes, which may slow down websites. Compress images for web use with tools like TinyPNG.
- Using Low-Quality Sources: Extremely pixelated images may not upscale well, even with advanced tools.
- Skipping Previews: Always check the output before saving to avoid wasting time on poor results.
Conclusion
Increasing image resolution is a straightforward process with the right tools and techniques. By following these steps—choosing a tool, uploading your image, adjusting settings, enhancing details, and saving correctly—you can achieve professional-quality results in minutes. Whether you’re a beginner or a pro, modern AI-powered and traditional tools make it easy to transform low-resolution images into stunning visuals.
Ready to enhance your images? Try one of the recommended tools today and see the difference high-resolution visuals can make!